Categories
Workflow

Moving from Delicious to Pinboard for Article Roundups

A little “inside baseball” here.

I had been using Delicious as a means to bookmark links for my Article Roundup posts (as well as a newsletter to colleages at my day job). Delicious has been through many pains over the years, being bought and sold by Yahoo! and building the app from the ground up.

In the last few months, Reeder for both OS X and iOS is not escaping strings of titles and descriptions, so I was having to unescape strings every week before my email/Roundups auto-posted. I’ve filed a bug with the developer, but for a service that not very many people use, it hasn’t been fixed (I really don’t blame him. I’m probably the only one that still uses Delicious). Needless to say, I’ve moved over to Pinboard.

How the workflow works

  1. I bookmark links in my RSS Reader, using descriptions for a comment on the link.
  2. Every Friday, MailChimp sniffs out the RSS feed and sends an email out to my coworkers with new links.
  3. I have to manually go into WordPress and publish a post using Delicious Curator plugin. I had to modify this plugin to work with Pinboard, which didn’t take very long. Eventually, I’d like to use wp-cron to take care of this automatically.
  4. Using IFTTT, anytime a link comes in from Pinboard, it posts to our @hoverboard88 twitter account.

This is about as automated as I can get it. If you have a similar workflow, feel free to use this.

What this means to you

If you are following me on Delicious or subscribed to my Delicious RSS feed, you’ll need to move over to the Pinboard RSS Feed.

It feels better to be on a service that is more supported, and I no longer have to manually escape strings every week. 🙂
Categories
Workflow

Learning html/css

My wife had sent me a text asking me for a list of html/css (aka Front-End Development) resources for someone she knew. It didn’t take too long to get a list together of things I use, but I thought I really should put this out for anyone else.

Free Courses:

Remember, Google is your friend. If you have a problem, chances are someone else has had the same issue, so Google the question you are asking. I tend to gravitate to these sites:

Paid Learning:

Podcasts:

Tools:

If you are looking for people to follow, check out my followers on Twitter (they are mostly Web people).

Feel free to comment if there are some great tools or resources that you think I missed.

Categories
Tutorials Workflow

Batch Upgrading WordPress installs on server

PSA: You shouldn’t just willy nilly upgrade your WordPress installs. It’s best to test your upgrade in a staging environment.

Every time a WordPress update comes out, I cringe having to update all the sites on my VPS server. I finally hunkered down today and got a shell script written to upgrade all WordPress installs on a server.

This solution will upgrade on one server, so If you have WordPress installs sprawled across multiple servers, you might want to look into a service like ManageWP.

The key is wp-cli

wp-cli is a command line tool that helps streamline WordPress tasks like upgrading, installing and configuring.

Installing wp-cli

Note: Right now, I haven’t successfully installed wp-cli globally, so for now, you will have to install wp-cli for each user on your server. Add a comment to this post if you have successfully done a global install.

Update: wp-cli changed their installation and you can now do a global installation.

Follow the wp-cli installation guide to install globally.


Creating the shell script

We’ll create a script that will upgrade wordpress, the database, all plugins, and all themes. You can edit this accordingly in the script below.

Create the file

$ vim push_all_wordpress_sites.sh

Paste the following into your new file:

#!/bin/bash

paths=(
  /home/USERNAME/path/to/wordpress
  /home/USERNAME/path/to/anothor/wordpress
)

for PATH_STRING in "${paths[@]}"
do
  :

  # regex to extract username from path
  re="\/home\/([^/]+)\/"
  if [[ $PATH_STRING =~ $re ]]; then

    # change to correct directory
    cd ${PATH_STRING}

    echo "Backing up" ${PATH_STRING} "Database..."
    /usr/bin/sudo -H -u ${BASH_REMATCH[1]} zsh -c '~/.wp-cli/bin/wp db export'

    # prompt user of upgrade
    echo "Upgrading: " ${PATH_STRING}

    # do wp-cli magic
    /usr/bin/sudo -H -u ${BASH_REMATCH[1]} bash -c '/usr/local/bin/wp core update'
    /usr/bin/sudo -H -u ${BASH_REMATCH[1]} bash -c '/usr/local/bin/wp core update-db'
    /usr/bin/sudo -H -u ${BASH_REMATCH[1]} bash -c '/usr/local/bin/wp plugin update --all'
    /usr/bin/sudo -H -u ${BASH_REMATCH[1]} bash -c '/usr/local/bin/wp theme update --all'

  fi

done

Note: This script assumes that your paths are full paths including the username folder.

As you’ll see in the “paths” variable in the top, you’ll want to change those placeholders to real paths on your server where your WordPress installs are located.

Executing the script

From here you just need to change the permissions of your new file:

$ chmod 755 push_all_wordpress_sites.sh

Then, you can run it anytime you want to upgrade all of your WordPress installs:

$ ./push_all_wordpress_sites.sh
Categories
Tutorials Workflow

Making SSH logins super-quick

SSH access is pretty essential these days in web development. Especially if you have root access to a server, or using tools like Grunt, Git or Sass. But signing into them can be very time consuming.

I just recently put together a straightforward workflow (OSX and Linux) for logging into a server via SSH.

Using an SSH Config file

The SSH Config file saves your usernames, hosts and ports into a single config file.

  1. If the config file isn’t there, create it by running these commands:
    $ mkdir ~/.ssh # this directory may already exist
    $ vim ~/.ssh/config
  2. Now you can edit this file and add the following code for each server you want to connect to:
    Host ryan
        HostName ryantvenge.com
        Port 22 #The default port for SSH.
        User user_name
  3. Now, you can simply type ssh ryan to connect to the server.

Creating SSH Keys

But it is still asking for your password. So let’s get rid of that step too by creating an SSH key. SSH keys are a great tool to secure access to servers. It gives you the ability to use super-secure passwords because you don’t have to remember them. But they are kind of a pain to setup.

Run the following comands:

$ ssh-keygen -f ~/.ssh/ryan -C "ryan"
$ ssh ryan 'mkdir ~/.ssh && touch ~/.ssh/authorized_keys #these files may already exist, so you may get an error. Don't worry
$ cat ~/.ssh/ryan.pub | ssh ryan 'cat >> .ssh/authorized_keys'
  1. The first command creates the key. For simplicity’s sake, I named the key the same name as our SSH config shortcut name, “ryan”. When asked for a passphrase, simply hit return twice.
  2. The second command is creating a spot on the server to hold your ssh key.
  3. The last command copies your public key up to the server.

And Bob’s your uncle, you are all done! No more typing passwords in when pushing and pulling Git repos. No more forgetting IP addresses of servers. And best of all, you can now make your passwords sooper secure 50 character random strings, because you won’t need to type time in manually on a regular basis.

Update: If you are using git, you’ll need to update your remote path with the shortcut name, otherwise it won’t use your ssh key:

url = ssh://SHORTCUT_NAME/path/to/git/repo
Categories
Troubleshooting Workflow

Ugh. Checking out files with Perforce

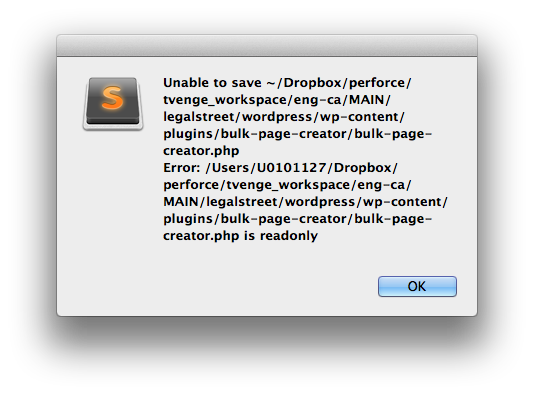
If you are one of the unfortunates that have to use Perforce version control (I prefer Git), you may have the same annoyance I do:

File Not Readable

If you are like me and used to Git, where you don’t have to check out files, try this little ditty:

  1. Checkout your whole folder you are working on (for me, it’s the WordPress theme I’m writing).
  2. When you are all done with your changes, right-click that same folder and click revert unchanged files ($ p4 revert -a) and that unchecks out the files you didn’t touch.

Not as great as just using a version control system that doesn’t require checking out files, but better than getting this alert on every file you try to edit (or every file sass or uglify tries to compile).

Tvenge Design